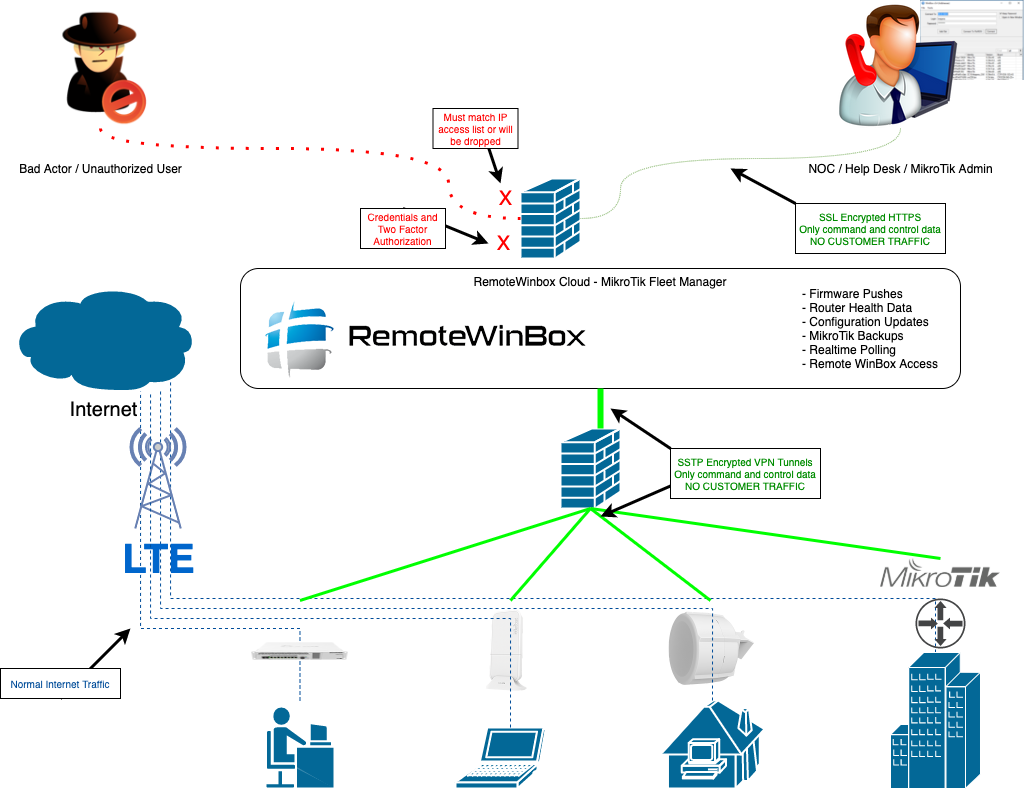
We've recently shipped two features that make it significantly easier to monitor fleet health and…

Having trouble with mynetname.net? Build your own solution for remote access!
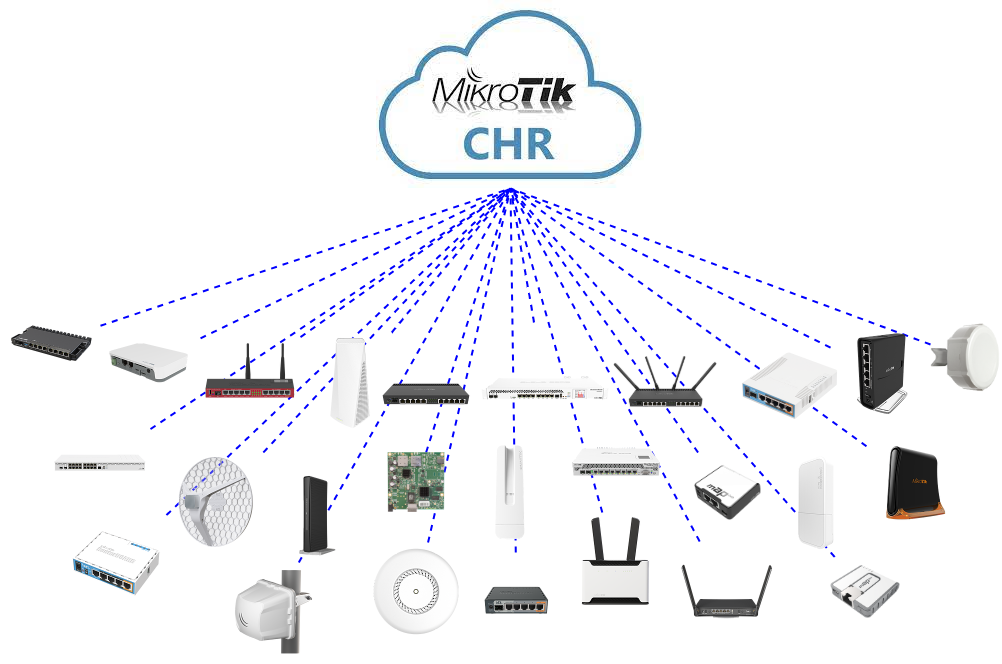
This week there was an unfortunate outage on the mynetname.net Dynamic Domain Name Service (DDNS) that MikroTik hosts for free to their customers. Many MikroTik users all over the world rely on this service for remote access to their MikroTik infrastructure. Official documentation is here: https://wiki.mikrotik.com/wiki/Manual:IP/Cloud#DDNS
I thought it would be useful to share what I learned about how RemoteWinBox solves this problem for its customers, so that you too can can roll your own remote access to your MikroTiks!
First off – So what happens when you enable DDNS?
[admin@MikroTik] /ip cloud set ddns-enabled=yes
Every 60 seconds your router will send out an encrypted update packet to MikroTik’s cloud servers, which will in turn update the DNS record pointing to your router’s assigned DDNS entry. On my home router, for example:
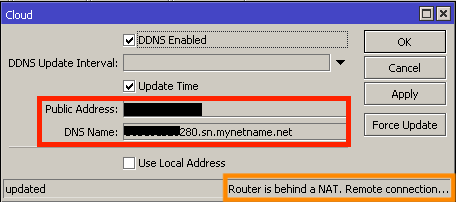
I’ve blocked out my IP and serial number, but MikroTik will make it easy so that if a router has a publicly reachable IP address, the serial number with suffix .sn.mynetname.net will point to its public IP. If you only use public IPs on your routers, this makes for an easy way to access your MikroTiks, even if the IP changes. Nice!
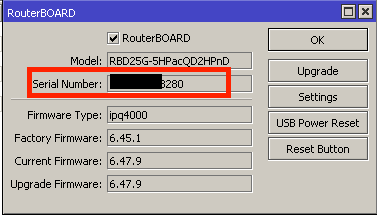
And you can see, as long as you inventory and track your serial numbers, the DDNS entry will follow the scheme of {{serial#}}.sn.mynetname.net as above.
If your router, like mine, is behind a NAT, enabling IP CLOUD isn’t enough to gain remote access and there’s more work to do… but more about that later.
What do you need then, to run your own remote access?
Obviously, there are many different ways to solve any problem, so I’ll suggest one here that I have used. Certainly, there are plenty of other mechanisms, but here’s my version:
- Spin up a VPN Concentrator
- Connect MikroTiks to your VPN server
- VPN your laptop/computer to your VPN server
- Access your routers remotely
1. Spinning up a VPN Concentrator
I’ve talked about this in several blogs, including my recent article on how to get access through NAT and LTE, and I did a MUM presentation on steps to do so a few years back if you’d like to watch a video guide.
I like to use a cloud provider for the VPN Concentrator, but you could easily put a dedicated box for the task in your Data Center (DC) or colocation (COLO) if that’s how you roll. Personally, Vultr has been great bang for the buck, but you could also use Digital Ocean, Amazon AWS, or whatever suits your fancy.
The reason I like to use CHR on a cloud provider is that you can get started in minutes and can grow sizing trivially by upgrading (and paying more) for a bigger compute/RAM instance at any time. In the long run, COLO or DC is definitely going to be cheaper and offer you better control, but cloud can be a cost effective alternative and I like having multiple test points, so having a CHR off network for troubleshooting can be useful too.
Whichever way you go, you’ll need to plan for some RAM for each VPN termination. Personal experience has shown that I like to estimate about 200K of RAM for each VPN, so if you want to support 1,000 MikroTiks, that’ll consume around 200MB. Even the smallest instances on cloud providers will easily handle more than that!
CPU however will likely be your limiting factor on cloud. If you’ve dedicated a CCR (Cloud Core Router), you’ll likely be ready to scale to tens of thousands of connections if the hardware is dedicated to the VPN server only, but in the cloud I suggest upgrading to gain additional CPUs every time you get past the 60-80% mark, since tracking and encrypting all those tunnel endpoints is a lot of work. The sizing will depend on your particular workload, but we outgrew VULTRs largest instance (at the time, 8 vCPU) at around 4,000 VPN terminations.
Finally, decide on what transport mechanism you want to use (more on that below) and enable the service, apply firewall exceptions, and set up a pool of addresses for your customers (the MikroTik routers) to use.

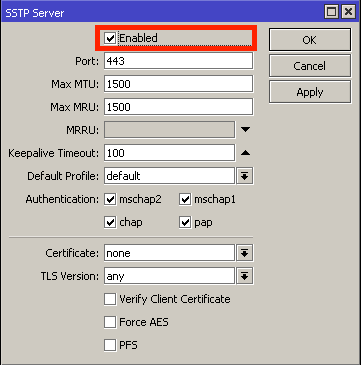

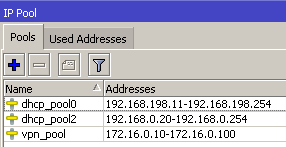
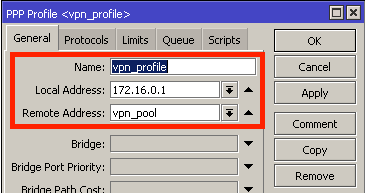
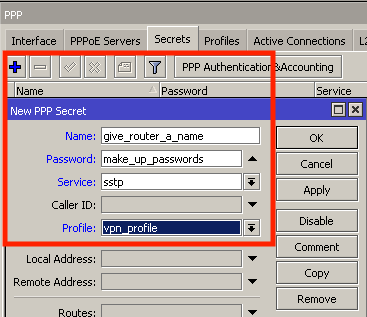
Please don’t forget to harden your VPN server! If you’d like some tips, check out my 3 part series on security: Part 1. Part2. Part 3.
2. Connecting Tiks to your VPN server
As is often the case, there’s a whole bunch of ways to get your MikroTiks connected to your new VPN concentrator. I’ll make a suggestion to use SSTP (Secure Socket Tunneling Protocol), but you could choose any connectivity you’d like, such as L2TP (Layer 2 Tunneling Protocol), IPSEC (IP Security), PPTP (Point to Point Tunneling Protocol), IPIP, etc.
The reason I like SSTP is because it is insanely easy to set up between MikroTiks and provides a decently high level of security that can traverse NAT and (most) firewalls. Every other protocol listed is either more difficult to configure, more difficult to use in the wild (read: real networks across the Internet), or is tons less secure – some all of the above.
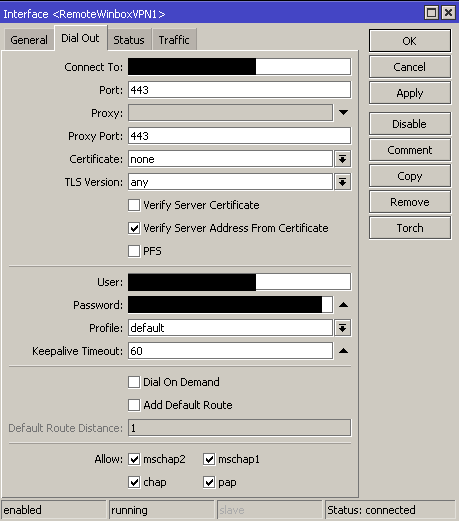
Regardless of your selection, if you follow the advice on using SSTP-client interface here you’ll end up with a connection to your VPN server
3. VPN your laptop to your VPN server
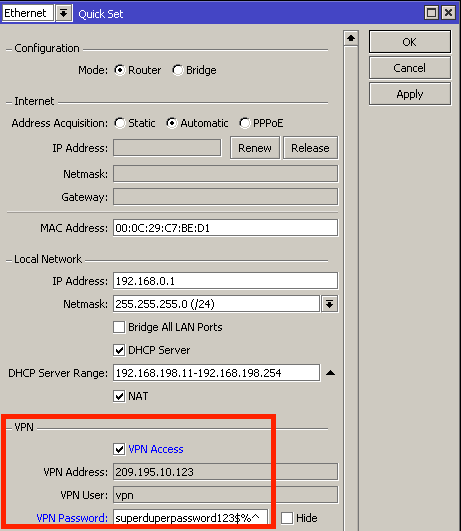
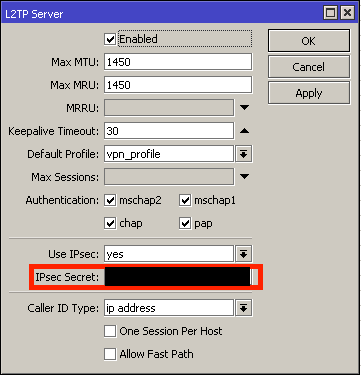
There are many ways to enable laptop (or PC, or phone) accessible VPN access, but the easiest way to turn on road warrior access for your VPN server is to head to QUICKSET and enable VPN access and add a very strong password! Official documentation here: https://wiki.mikrotik.com/wiki/Manual:Quickset#VPN and there are many other options, such as https://help.mikrotik.com/docs/display/ROS/IPsec#IPsec-RoadWarriorclientwithNAT.
4. Success!
You should now be connected to your VPN concentrator and all your MikroTiks should also be connected, so you can access any of them!
Bonus: using this method, you’ll be able to punch through NAT, so even if your in the field MikroTik doesn’t get a public Internet IP, it will still be reachable from your laptop when it’s connected to the VPN! I think that’s very cool!
Anything else?
Another method that comes to mind that could be simple if you’re a DNS admin (which I won’t cover here) is to leverage MikroTik CLI scripting to get the routers current IP address – perhaps getting the address from a provider such as ipinfo.io or others – and sending a DNS zone update to your own custom DNS servers if/when it changes.
Or, if you’re a Linux wiz you could build VPNs to a Linux server (cloud or not) and build reverse SSH tunnels.
Can you just buy a service that does this? Absolutely!
This is exactly what RemoteWinBox was created to do – provide remote WinBox access to MikroTiks, securely and from anywhere in the world as a Software as a Service (SaaS). If you’re like thousands of our customers who don’t want to go through all the hassle of building and managing this infrastructure, you can get started for free in just a few minutes by creating an account on our site.
