


We've been heads-down improving the Subscriber View in Compass WiFi, and this release brings some of the biggest usability upgrades yet.

MikroTik Wireless WiFi Extender – How-to guide
Several RemoteWinBox customers have asked us to create some documentation on how to create a wireless backhaul network between 2 MikroTiks so that you can boost the coverage area of access points without the need to run wires. This guide will show you how we created a wireless mesh WiFi network with MikroTik HAP AX3’s on the 5Ghz network. Keep in mind, you can use whichever frequency and model of MikroTiks you’d like even though we used the HAP AX3 backhauled on 5Ghz. This configuration strategy will work on ROS6 and ROS7, as well as WiFiWave2 for universal support. We suggest tweaking several settings, like the SSID names and passphrases, frequency and channel-width settings, system identities of your Tiks, and any other values that make sense for your deployment.
We were asked to put the copy+paste at the top for easy access, so here you go: (scroll down for Winbox screenshots with explanations)
Main MikroTik – AX series
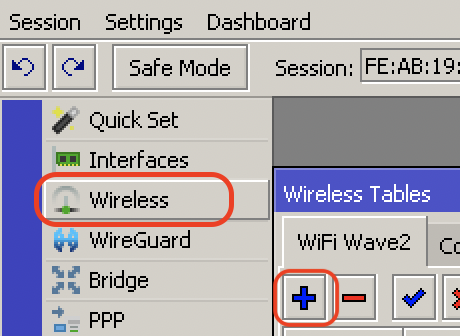
pull it out of the box, connect to Winbox and open a NEW TERMINAL window and paste the following:
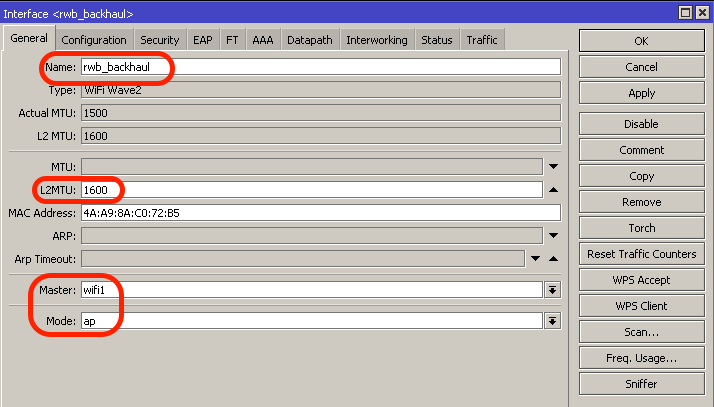
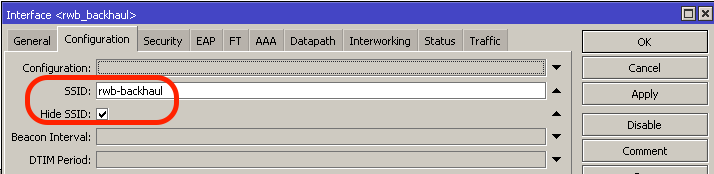
/interface wifiwave2 add configuration.mode=ap .ssid=rwb-backhaul .hide-ssid=yes disabled=no l2mtu=1600 master-interface=wifi1 name=rwb_backhaul security.passphrase=1234567890
set [ find default-name=wifi1 ] channel.band=5ghz-ax configuration.country="United States" .mode=ap .ssid=customername-wifi disabled=no security.authentication-types=wpa2-psk,wpa3-psk security.passphrase=1234567890
set [ find default-name=wifi2 ] channel.band=2ghz-ax configuration.country="United States" .mode=ap .ssid=customername-wifi disabled=no security.authentication-types=wpa2-psk,wpa3-psk security.passphrase=1234567890
/interface eoip add name=rwb_eoip remote-address=192.168.98.2 tunnel-id=1 mtu=1500
/interface bridge port add bridge=bridge interface=rwb_eoip
/ip address add address=192.168.98.1/30 interface=rwb_backhaul
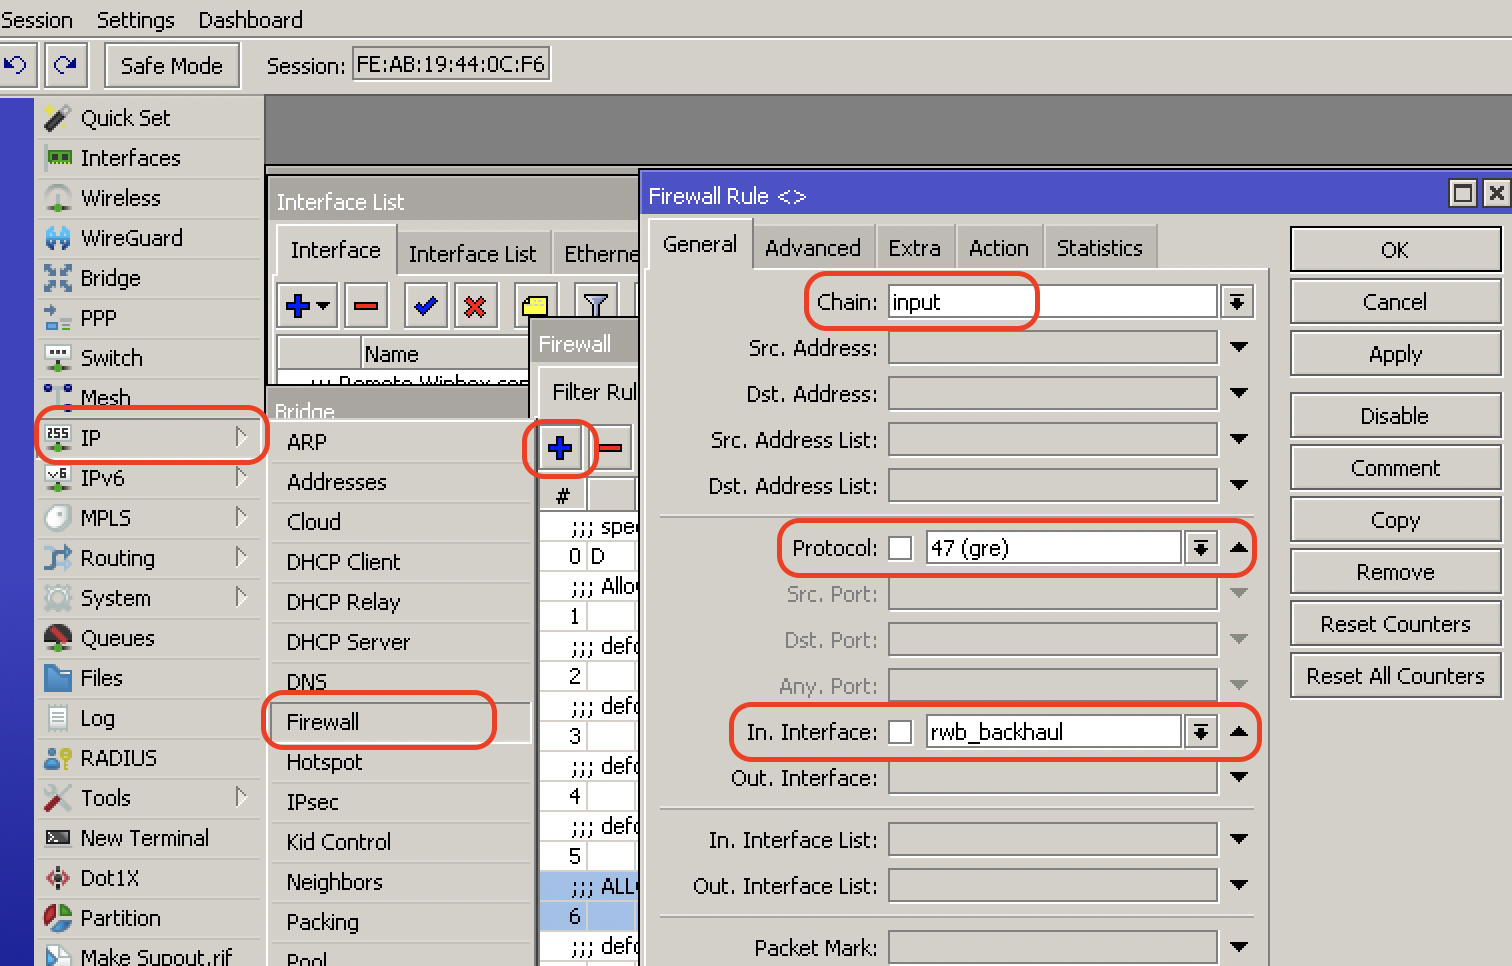
/ip firewall filter add action=accept place-before=1 chain=input comment=ALLOW_GRE in-interface=rwb_backhaul protocol=gre
/ip dhcp-server set 0 lease-time=1h
/ip dhcp-server network set 0 dns-server=1.1.1.1,9.9.9.9
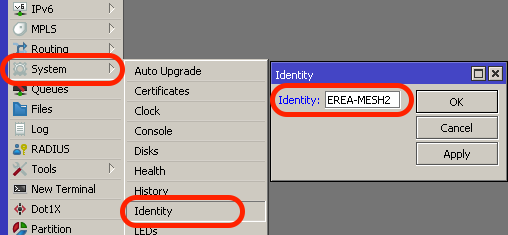
/system identity set name=customername-MESH1
/log info "Wireless Mesh configuration added!"
Optional – add RemoteWinBox configuration too for centralized MikroTik management!
Wireless Extender – AX series
pull it out of the box, connect to Winbox and perform a SYSTEM — RESET CONFIGURATION, tick boxes for KEEP-USERS and NO-DEFAULT-CONFIGURATION and approve RESET-CONFIGURATION — YES. Wait for the MikroTik to reboot and reconnect to Winbox, open a NEW TERMINAL window and copy + paste the following:
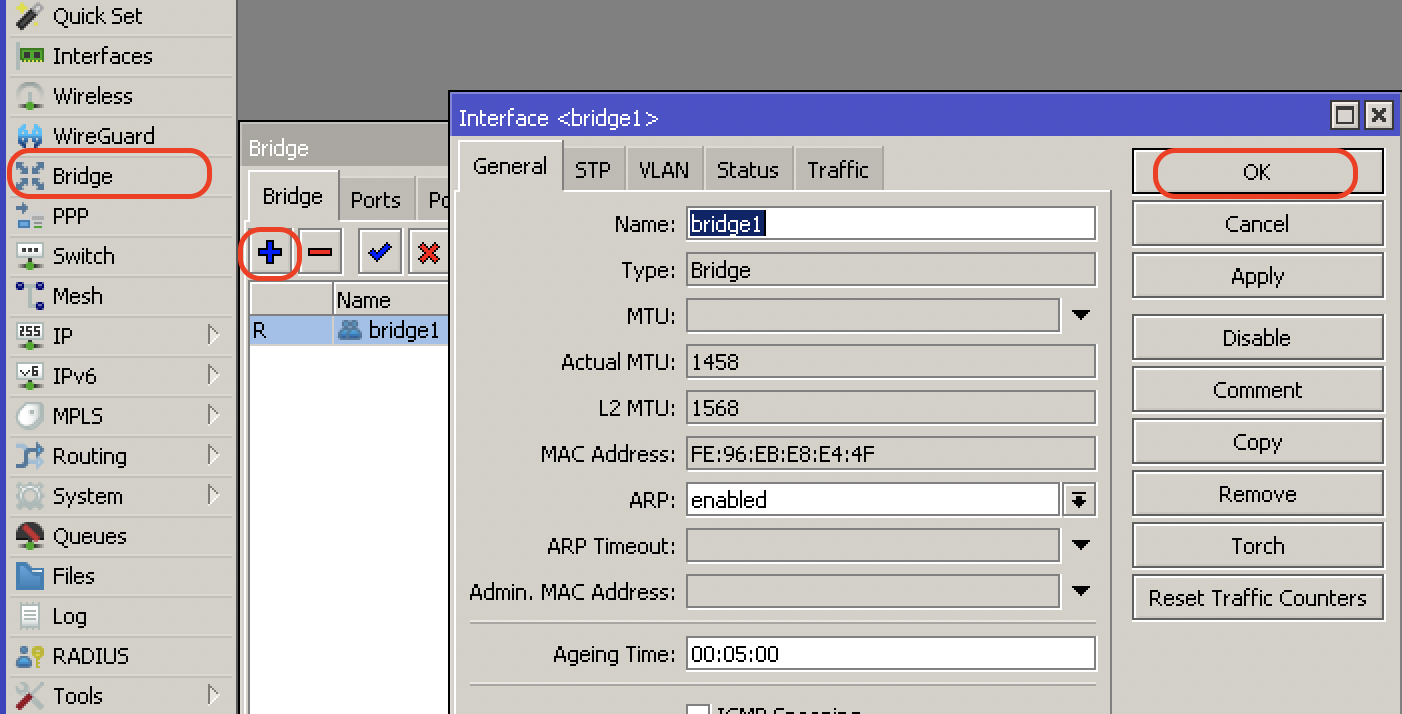
/interface bridge add name=rwb_bridge
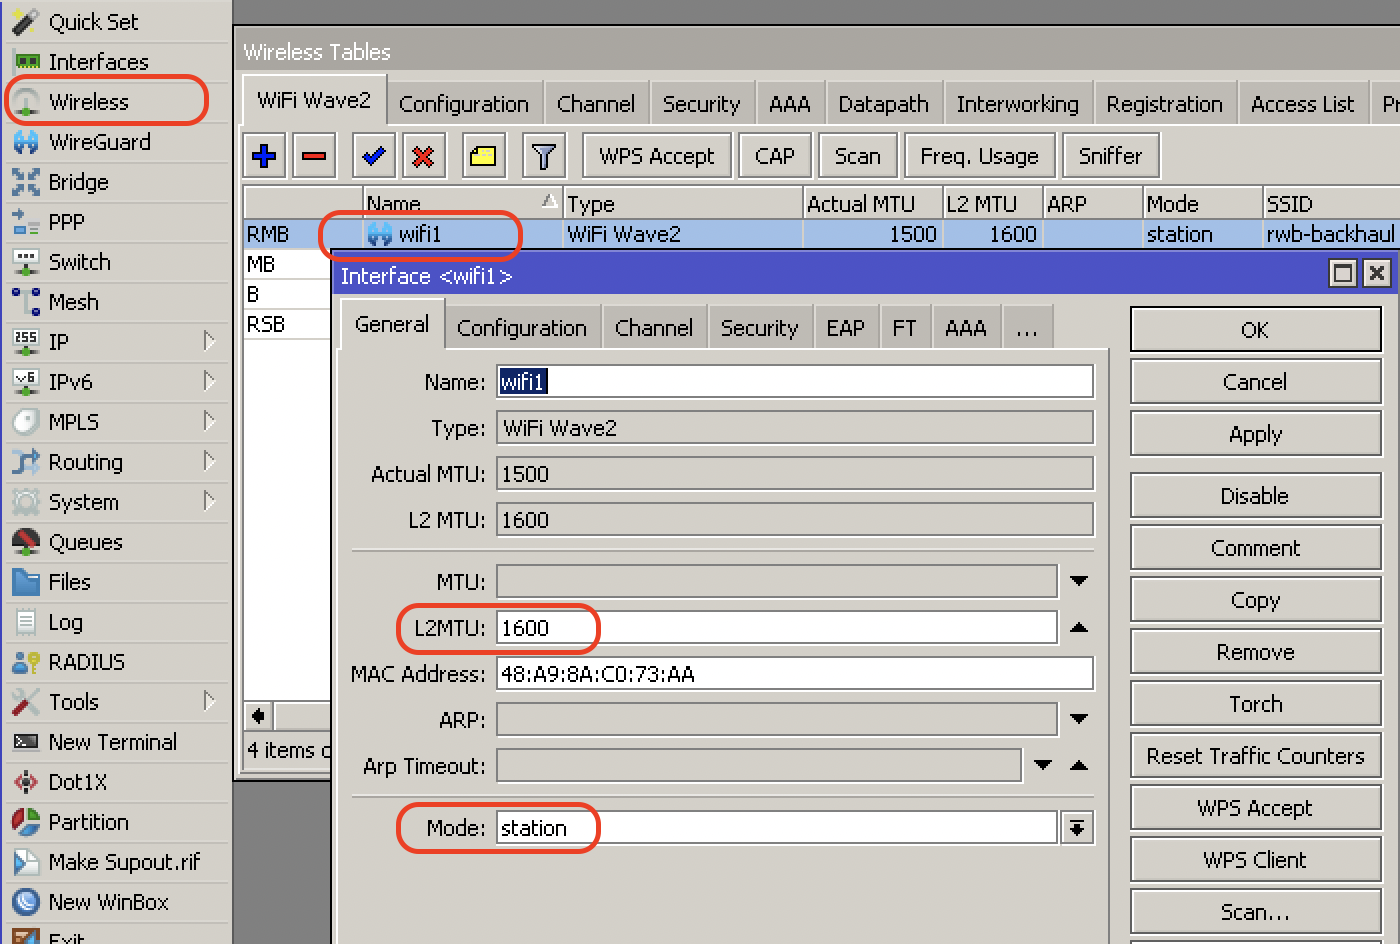
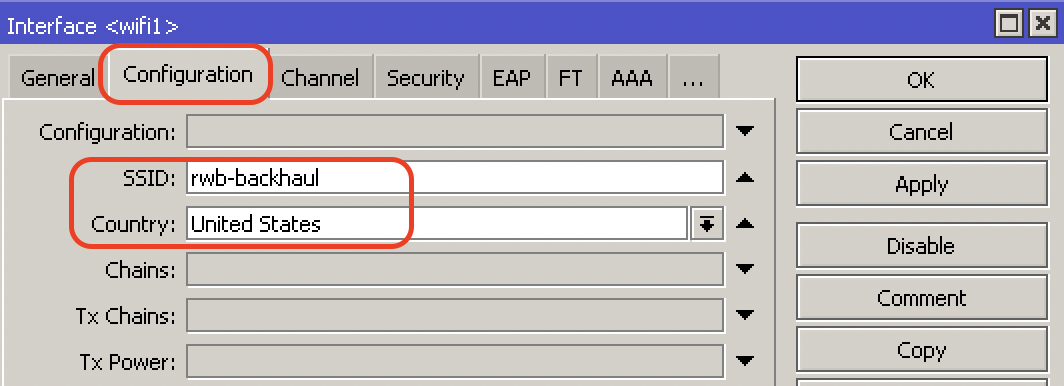
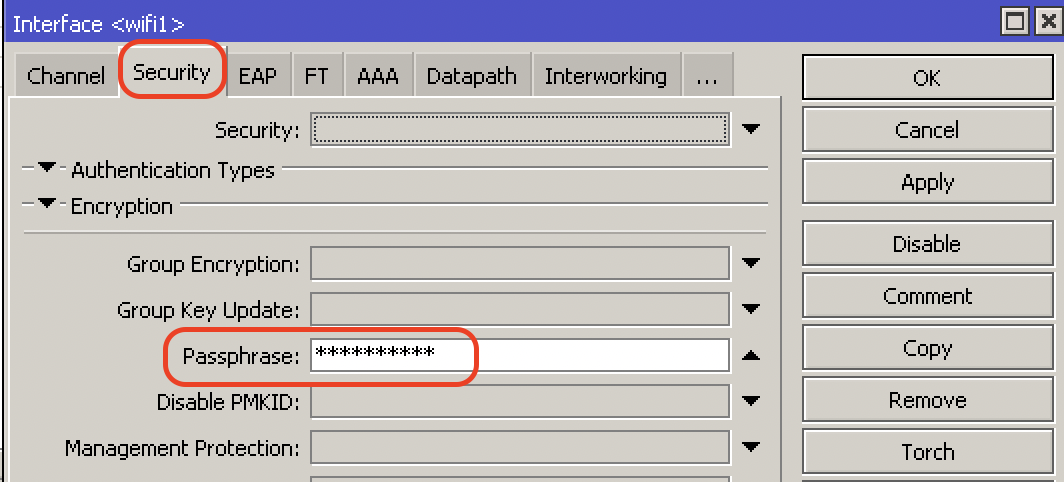
/interface wifiwave2 set [ find default-name=wifi1 ] configuration.country="United States" .mode=station .ssid=rwb-backhaul disabled=no l2mtu=1600 security.passphrase=1234567890
set [ find default-name=wifi2 ] configuration.country="United States" .mode=station .ssid=rwb-backhaul disabled=no l2mtu=1600
add configuration.mode=ap .ssid=customername-wifi disabled=no l2mtu=1600 master-interface=wifi1 name=wifi3 security.passphrase=1234567890
add configuration.mode=ap .ssid=customername-wifi disabled=no l2mtu=1600 master-interface=wifi2 name=wifi4 security.passphrase=1234567890
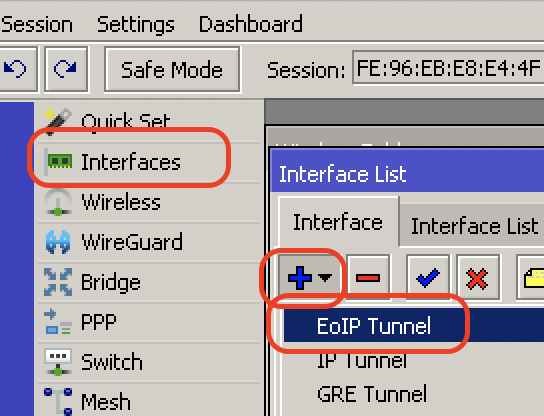
/interface eoip
add disabled=no name=rwb_eoip remote-address=192.168.98.1 tunnel-id=1 mtu=1500
/interface bridge port
add bridge=rwb_bridge interface=ether1
add bridge=rwb_bridge interface=ether2
add bridge=rwb_bridge interface=ether3
add bridge=rwb_bridge interface=ether4
add bridge=rwb_bridge interface=ether5
add bridge=rwb_bridge interface=rwb_eoip
add bridge=rwb_bridge interface=wifi3
add bridge=rwb_bridge interface=wifi4
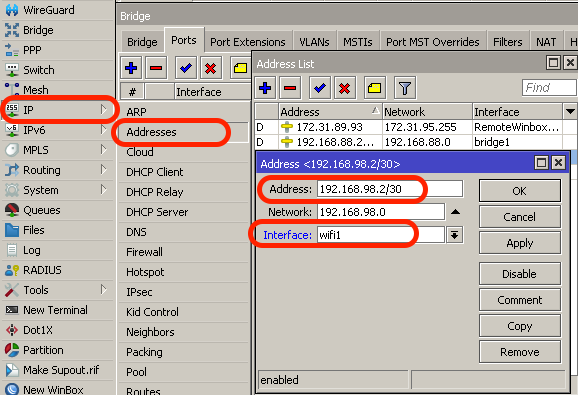
/ip address
add address=192.168.98.2/30 interface=wifi1
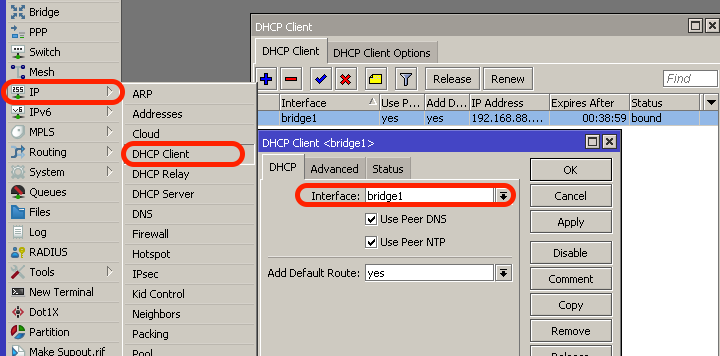
/ip dhcp-client
add interface=rwb_bridge
/system identity
set name=customername-MESH2/log info "Wireless Mesh configuration added!"
Optional – add RemoteWinBox configuration too for centralized MikroTik management!
Main MikroTik – non-AX (5 port HAP)
pull it out of the box, connect to Winbox and open a NEW TERMINAL window and paste the following:
/interface wireless security-profiles
add authentication-types=wpa2-psk mode=dynamic-keys name=backhaul wpa2-pre-shared-key=123456789
add authentication-types=wpa2-psk mode=dynamic-keys name=customer wpa2-pre-shared-key=123456789
/interface wireless
set [ find default-name=wlan2 ] band=5ghz-a/n/ac channel-width=20/40/80mhz-XXXX disabled=no
distance=indoors frequency=auto hide-ssid=yes installation=indoor mode=ap-bridge name=rwb-backhaul security-profile=backhaul ssid=rwb-backhaul wireless-protocol=802.11
set [ find default-name=wlan1 ] band=2ghz-b/g/n channel-width=20/40mhz-XX disabled=no distance=indoorsfrequency=auto installation=indoor mode=ap-bridge security-profile=customer ssid=customer-wifi mtu=1500
add disabled=no master-interface=rwb-backhaul name=wlan3 security-profile=customer ssid=customer-wifi-fast
/ip dhcp-server
set 0 lease-time=1h
/ip dhcp-server network
set 0 dns-server=1.1.1.1,9.9.9.9/interface eoipadd name=rwb_eoip remote-address=192.168.98.2 tunnel-id=1/interface bridge port
add bridge=bridge comment=defconf interface=wlan3
add bridge=bridge interface=rwb_eoip
/ip address add address=192.168.98.1/24 interface=rwb-backhaul
/ip firewall filter add action=accept place-before=1 chain=input comment=ALLOW_GRE in-interface=rwb-backhaul protocol=gre/system identity
set name=customername-MESH1
/log info "Wireless Mesh configuration added!"
Optional – add RemoteWinBox configuration too for centralized MikroTik management!
Wireless Extender – non-AX (5 port HAP)
pull it out of the box, connect to Winbox and perform a SYSTEM — RESET CONFIGURATION, tick boxes for KEEP-USERS and NO-DEFAULT-CONFIGURATION and approve RESET-CONFIGURATION — YES. Wait for the MikroTik to reboot and reconnect to Winbox, open a NEW TERMINAL window and copy + paste the following:
/interface bridge add name=rwb_bridge
/interface wireless security-profiles
set [ find default=yes ] authentication-types=wpa2-psk mode=dynamic-keys wpa2-pre-shared-key=123456789
add authentication-types=wpa2-psk mode=dynamic-keys name=backhaul wpa2-pre-shared-key=123456789
/interface wireless
set [ find default-name=wlan1 ] band=2ghz-b/g/n channel-width=20/40mhz-XX disabled=no frequency=auto mode=ap-bridge radio-name=customer-mesh2 ssid=customer-wifi
set [ find default-name=wlan2 ] band=5ghz-onlyac channel-width=20/40/80mhz-XXXX disabled=no frequency=auto name=rwb-backhaul security-profile=backhaul ssid=rwb-backhaul
add disabled=no master-interface=rwb-backhaul name=wlan3 ssid=customer-wifi-fast
/interface eoip
add disabled=no name=rwb_eoip remote-address=192.168.98.1 tunnel-id=1 mtu=1500
/interface bridge port
add bridge=rwb_bridge interface=ether1
add bridge=rwb_bridge interface=ether2
add bridge=rwb_bridge interface=ether3
add bridge=rwb_bridge interface=ether4
add bridge=rwb_bridge interface=ether5
add bridge=rwb_bridge interface=rwb_eoip
add bridge=rwb_bridge interface=wlan3
/ip address
add address=192.168.98.2/24 interface=rwb-backhaul
/ip dhcp-client
add interface=rwb_bridge disabled=no
/system identity
set name=customername-MESH2
/log info "Wireless Mesh configuration added!"
Optional – add RemoteWinBox configuration too for centralized MikroTik management!
Let’s get started
Main Unit
If you’re using a HAP, it comes pre-configured as a home access point with gateway, NAT, etc. and firewall rules – feel free to use the out of the box default configuration (or your own template). We need to build just a couple of items on the main unit to support wireless backhaul and LAN bridging.
- A virtual access point (VAP) for additional MikroTiks to attach to
- An IP address on the VAP we just created
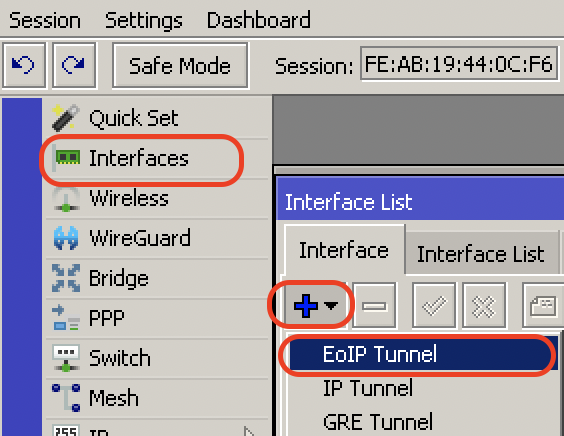
- An EOIP tunnel to connect the LAN of the main unit to the LAN of additional MikroTiks
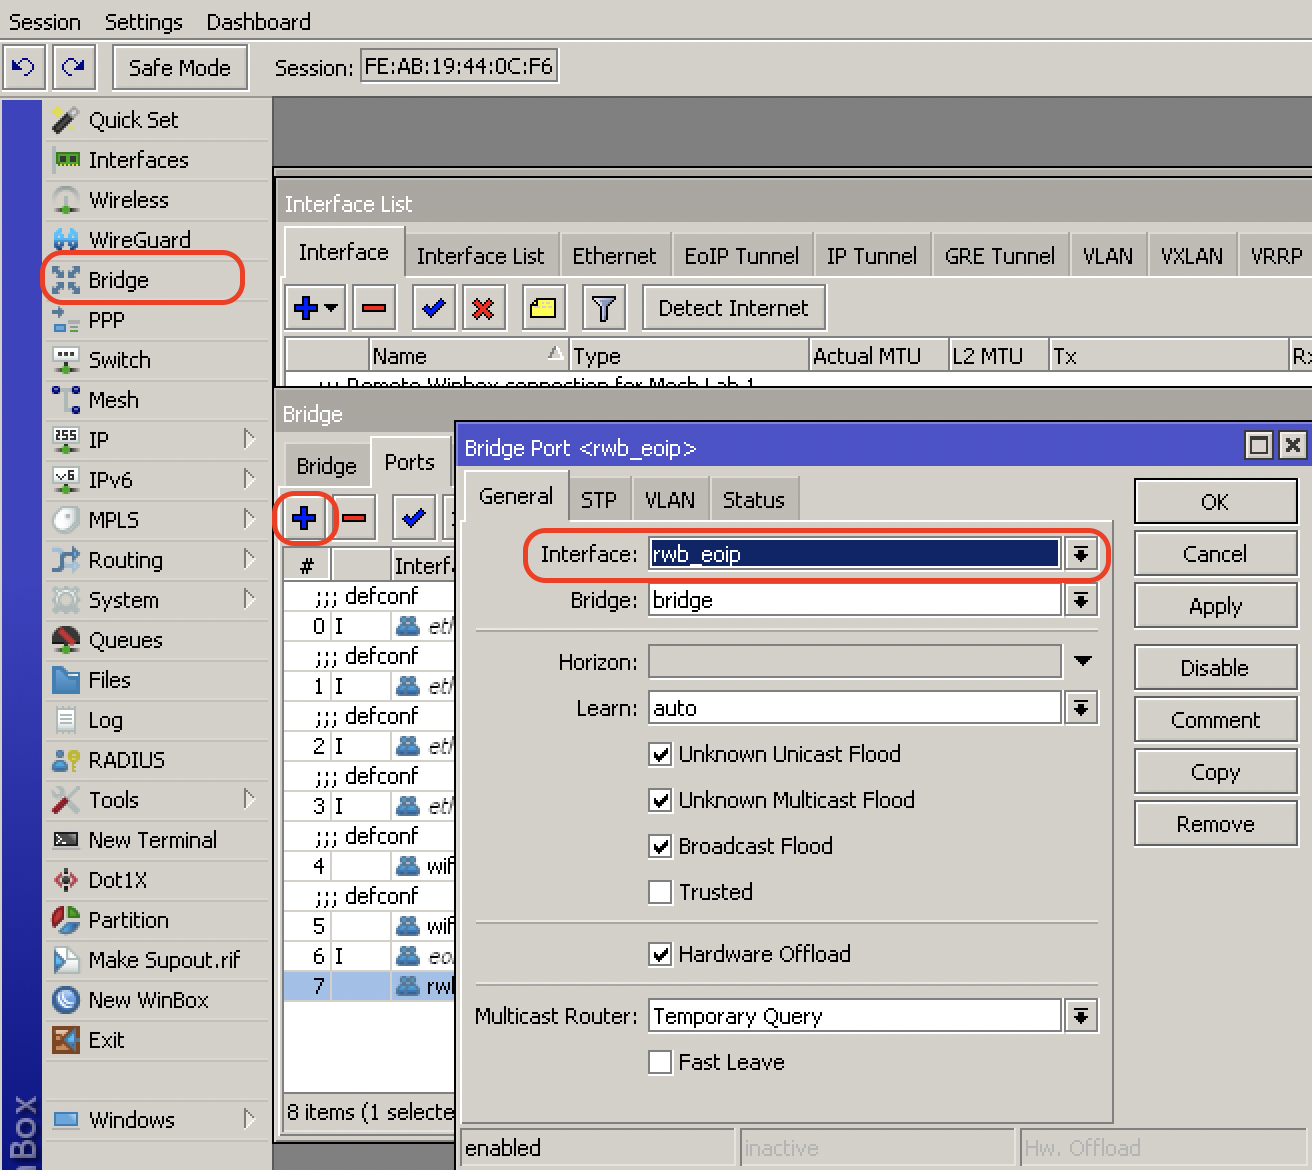
- Additional bridging
- A firewall update to allow EOIP to connect
Additional Wireless MikroTik AP
Here we take the MikroTik out of the box, login, and because we don’t want all the default, straight out of the box settings and configuration, we’ll perform a reset-configuration with no-default-configuration – a blank slate for us to work with. The steps are:
- Reset the MikroTik with no-configuration
- Add a bridge
- Set up WiFi for backhaul and AP
- And add virtual access points for local devices
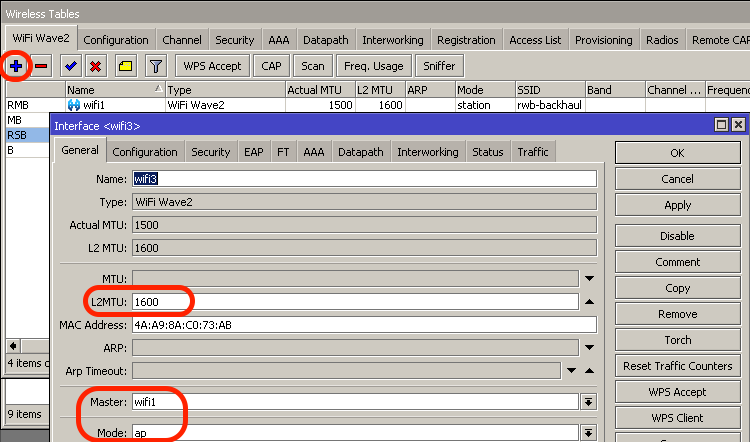
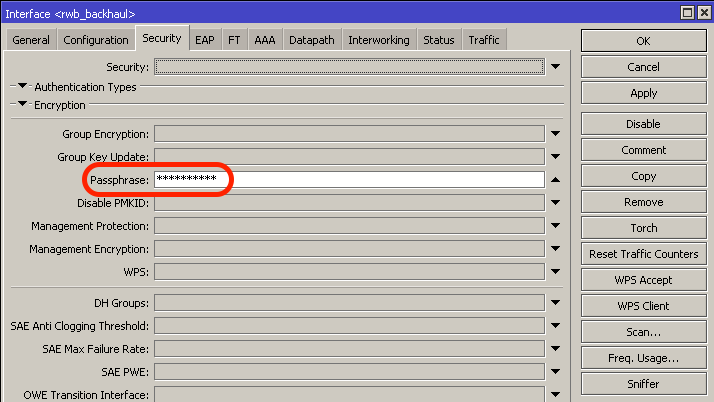
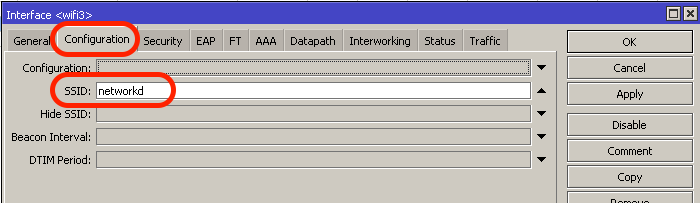
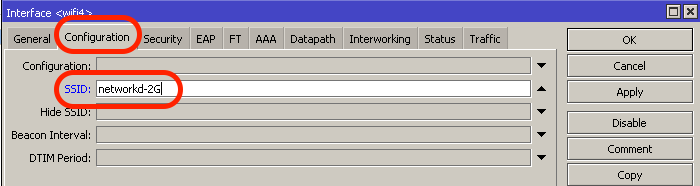
- Set the SSID
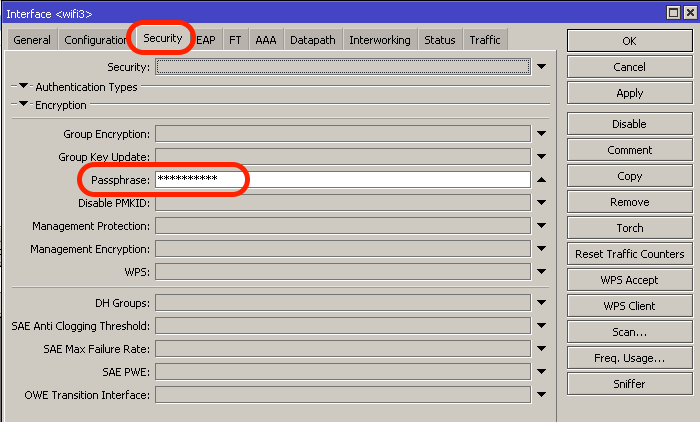
- Pick a PASSPHRASE for subscriber devices
- If it’s a DUAL BAND Mikrotik (2.4G and 5G radios), do those steps again for the other radio (master)
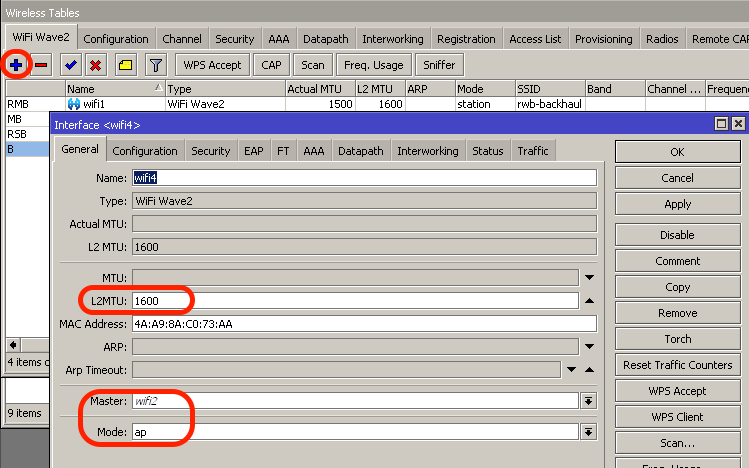
- add an EOIP tunnel
- Add all ports to the bridge (except backhaul) – do this step 8 times (5 ethernet, 1 EOIP, 2 VAP WLANs)
- Add an IP to the backhaul station
- Add a DHCP client on the bridge
- Update the system identity
We hope you find this helpful in setting up a wireless mesh WiFi network with MikroTik. Let us know how you use MikroTik in your network in the comments!
Cheers!
Related Posts