
Blank Backups in Admiral Platform? Your MikroTik SSH Host Key May Be Corrupt If your…
Tips4Tiks – MikroTik RouterOS Logging Tips
This post will take a look at MikroTik’s logging functionality and share a few simple tweaks to get the best bang for your buck in the logs with just a couple of easy steps.
The system logging facility in MikroTik is incredibly powerful and flexible. However, the default settings leave a lot to be desired (in my opinion!)
For example, the default logging only stores events in memory, so if your MikroTik reboots, you’ll lose forensic capabilities on what may have happened leading up to the reboot. Additionally, the defaults only store 1,000 lines of data, which isn’t much if you turn on any additional debugging as you’re trying to diagnose a problem.
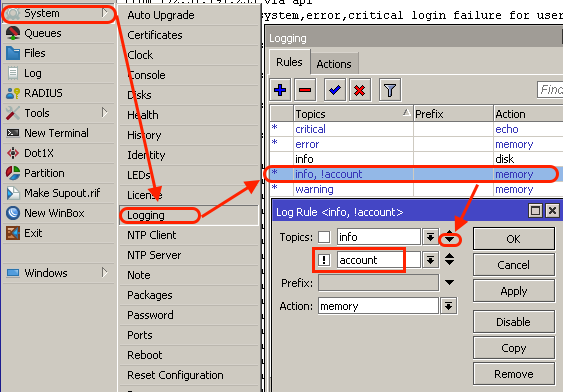
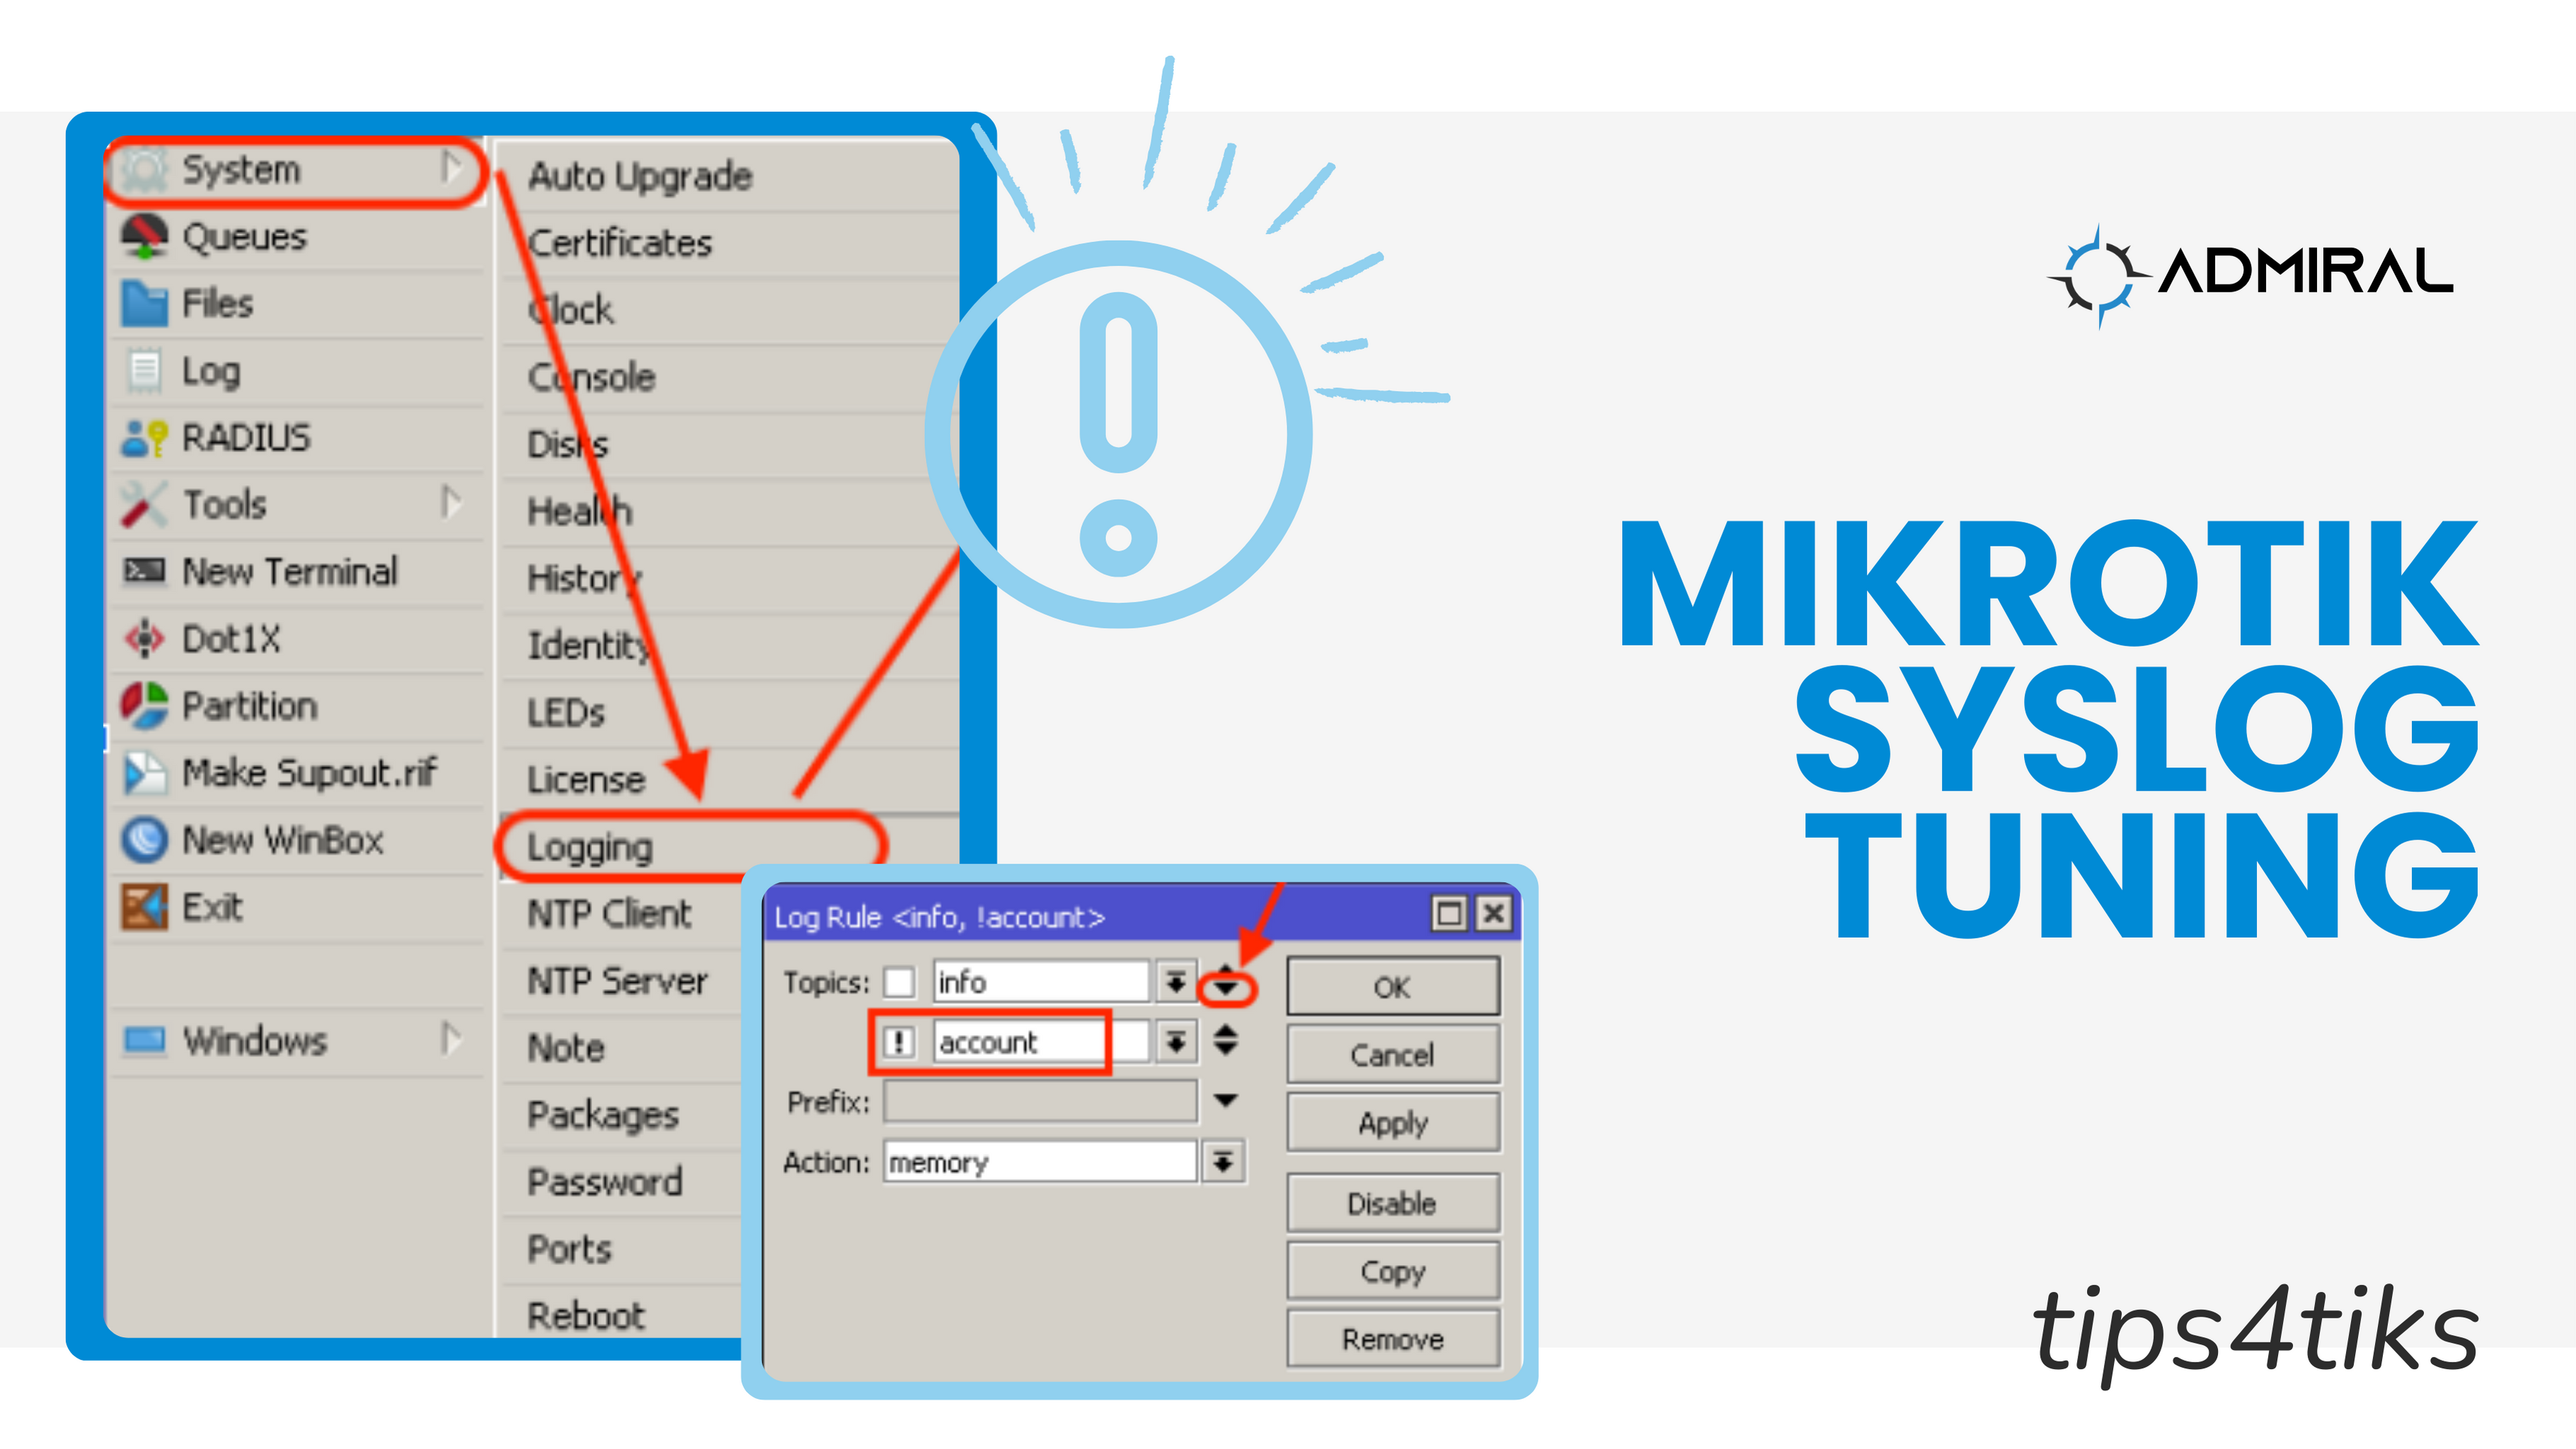
One example for Admiral Platform is that many folks want to disable and suppress successful logins as they are mostly concerned about failed logins. Admiral logs in over the API every 5 minutes to poll health and get telemetry and status, so if you want to suppress those successful logins you would do the following:
/system logging set 0 topics=info,!account
It’s the NOT account (!) that does the secret sauce here. This means that the router will keep logging all INFO events to memory as long as they are NOT account success messages. You’ll still get account failure messages like password failed and things of that type. Cool, huh?
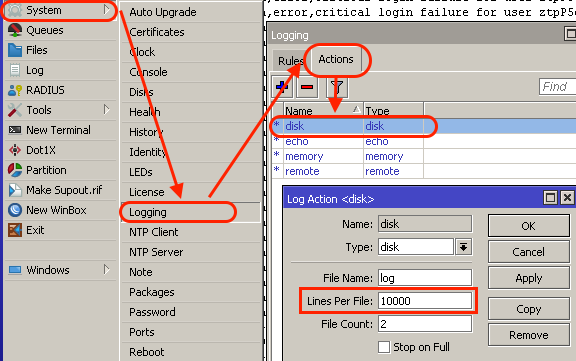
Now, let’s say you do want to be able to know who logs in successfully and when – here’s a suggestion: use the DISK facility!
The MEMORY facility gets cleared every time the router reboots, but the DISK facility sticks around until the line buffer cycles. So, if you have 1,000 lines, the disk will keep the most recent 1,000. We suggest upping the line limit to 10,000. In this way, you’ll have tons of log information available when you need to dig around and figure out what happened.
Here’s how to boost your DISK facility and use it to track ALL logins (both successful and unsuccessful).
/system logging add action=disk topics=info
/system logging action set 1 disk-lines-per-file=10000
Then, when you want to see normal logs you can look at MEMORY events and when you want to see everything, including persisting between router reboots, use DISK.
By implementing these couple of tweaks to MikroTik’s logging functionality, you can certainly increase the effectiveness of MikroTik’s logging and have accurate information to refer to when you need it.
Check out some of our other Tips4Tiks blogs, such as tips for using Scheduling or Safe Mode on MikroTik.
Cheers!
Related Posts