Let’s take a look at how easy it is to use any Mikrotik paired with RemoteWinBox to get access to your modem or LTE or fiber gateways GUI, even if it’s using a private IP or NAT. One of the benefits that RWB provides is remote management access to WinBox and today we’re going to show you how you can also gain access to your upstream device’s management interface.
Get Started #

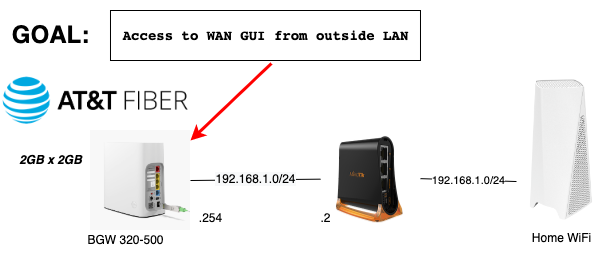
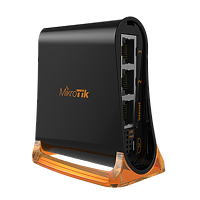
If you take a look at the diagram above, you’ll see what we’re trying to accomplish. It’s pretty simple. For this post, I grabbed the least expensive Mikrotik I have, the 3 port HAP Mini. it’s a cool little device with just 3 ethernet ports and is smaller than my hand. And it can often be found for less than $20.

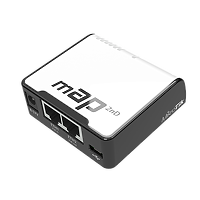
Keep in mind that you can use any Mikrotik ROS router or switch to accomplish what we’re going to do today with RWB. So, another great low cost option is the 2 port mAP because it has POE out and can be used to power the upstream gateway, like an SXT, LHG, LTE modem or other CPE radio. Tons of options exist depending on whether you need POE, fiber, WiFi, etc. Check out https://mikrotik.com/products for more ideas.

Let’s Config #
Looking at the diagram, you can see that we just have an Internet connection, which for me is my ATT fiber broadband gateway using the BGW 320-500 and we’re hanging the HAP mini right behind it. The ATT gateway is set up to provide DHCP 192.168.1.0/24 for the LAN and is configured for 192.168.1.254 as the gateway. My HAP mini got assigned 192.168.1.23 and our goal is to access the WEB GUI that’s at https://192.168.1.254.
Now let’s see how easy it is to use RWB to get access to the ATT GUI using my Mikrotik and RWB. First, I logged into my RWB account and added a new router, making sure to click the slider for the Additional Remote Access port.

This feature has many use cases – if I leave the default value here I could use RWB to give API access to another Mikrotik software that depends on API access. If I were to make that port 22, this would allow remote access to WINBOX using the first URL and remote access to SSH using the second one (see below screenshot). For the port to access my ATT GW, I just picked an arbitrary port and used 8888.
After clicking Submit to add the router to your account, you can see the additional remote access URL at the bottom of the page.

If you copy + paste the install script onto your Mikrotik you’re already almost done. All that’s left is to navigate to port forwarding and add a port forward for the RWB VPN interface on port 8888 to go to 192.168.1.254 on port 443. The port forward can be found by mousing over the green router settings button on the router listing.

Manual Process #
If you’d rather just add this manually using WINBOX, head over to IP FIREWALL NAT and a new rule with chain=dst-nat, protocol=TCP, dst-port=8888 and in-interface=RWBVPN, click on actions and action=dst-nat, to-address=192.168.1.254 and to-ports=443.
What the above statement does is say that if we get packets through the RWB VPN service coming in on TCP/8888, go ahead and forward those packets to 192.168.1.254 (my ATT GW) on it’s web interface (HTTPS/443).
That’s All There Is #
And that’s it! If your non Mikrotik device has a web GUI and If you grab the additional remote access URL from the configuration page of your RWB router, you’ll now have access to the GUI of your device from anywhere in the world, just as though you were on-site! Pretty cool, huh?
Keep in mind, you could use a different port to gain access to a custom application, such as SSH etc, and even though I used this feature to access a fiber web GUI, it could also be used to access any upstream management interface, like an LTE modem web GUI instead, for example.


